The new Lovilee is here!

Posted by  | Monday, February 28, 2011  at 6:30 AM  


"I am very excited to bring you a sneak preview of what you will wake up to tomorrow morning! It has long been a dream of mine to do something creative, letting go of all the energy stored up inside in a constructive way. The idea of a blog had been on my mind for a while, but as with most ideas in life, acting on the impulse proved more difficult.

In December last year I took the leap and started www.lovilee.blogspot.com. I designed the logo in MS Word (very trendy) and managed to get a decent look and feel going. I then approached my sister (who is a way better cook than I could ever dream of being) to do a Thursday recipe for all those kitchenites out there.

Melanie Wessels, who was responsible for my gorgeous wedding photos last year and whom I subsequently became good friends with, approached me with an idea to go professional with the blog. I was super exited that she was willing to bring her talent and skill to the project and things just progressed from there onwards!

So, tomorrow is the big day, the migrate to www.lovilee.co.za! I'd like to thank ElmaRi and Melanie for all the hard work they have put in so far to make my dream a reality and hope to get to know you, the readers, better over time and even get a chance to spoil some of you with the give aways and competition prizes!"

- KaRi


"I am SO excited about Lovilee! Since I am a wedding photographer I get to meet many brides-to-be with ideas or maybe looking for inspiration. Lovilee will be such a great "place" to showcase trends, ideas and diy projects specifically for weddings. With Karen and Elmari both being so creative in their different fields, they inspire me to creativity and I'm sure it's contagious"

- Melanie


"Tomorrow is the first of many more lovilee days! The site will go live with great ideas, tips, things you always wanted to know-and-have and tantalising recipes. I love cooking and baking, but with the birth of my first daughter, my time has been cut in half and half again and half...okay you get the picture! She is a ray of sunshine in my life, I am loving being a mom and exploring the field of what's new, what works and what not. I will be sharing this info with you in the future.

I'd like to thank Karen and Melanie for all the hard work they've put in to get us going and having patience with me for not always grasping the latest techno-terms! But I'll get there. Enjoy this journey with us and please let us know what you like and would like more of. To many more Lovilee days!"

- ElmaRi


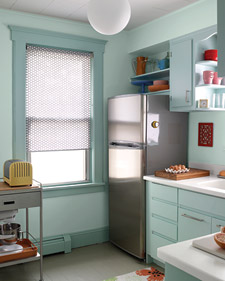
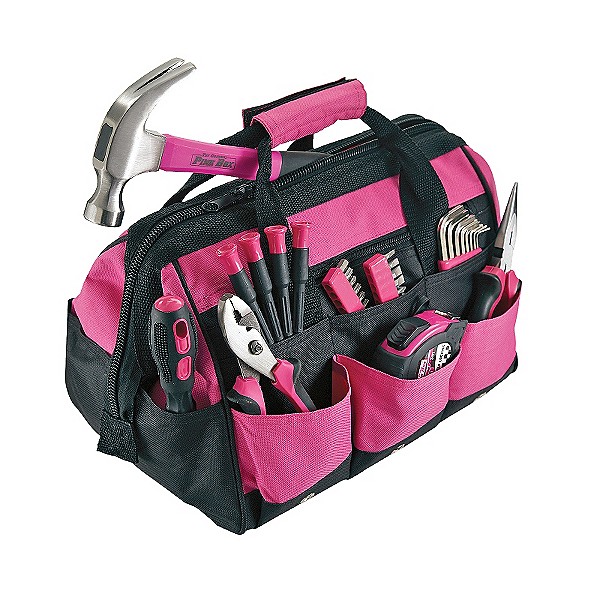
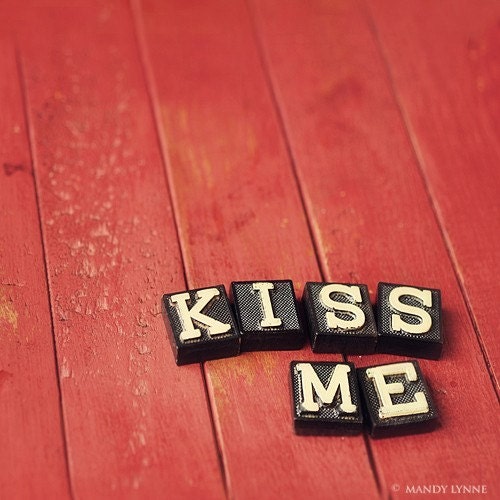
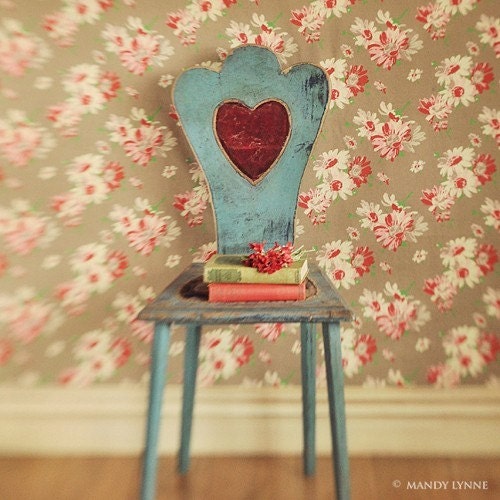
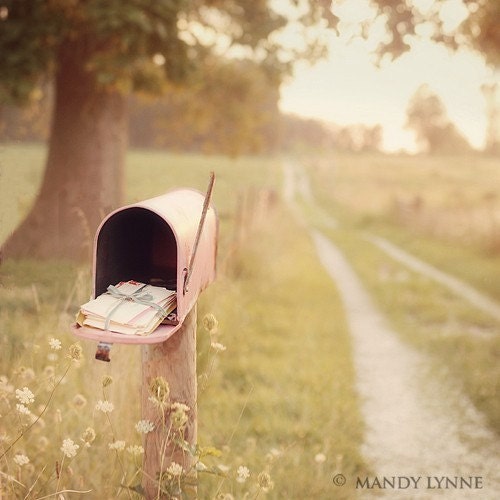
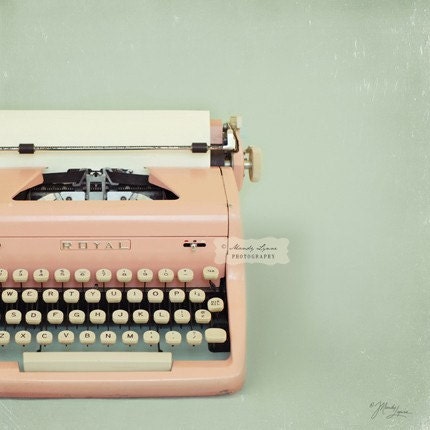
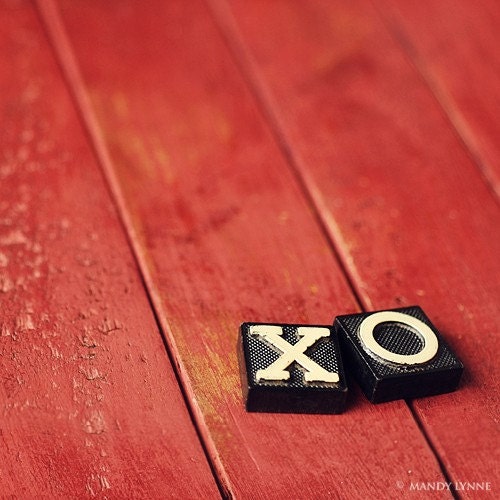
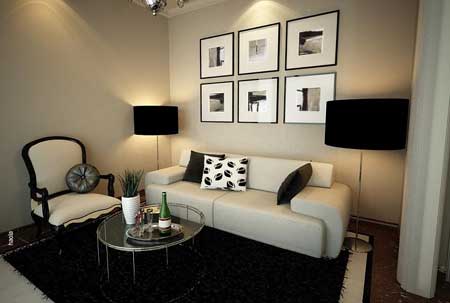
Here with a preview:

DIY: Step-by-Step Roller blind instructions

Posted by  | Friday, February 25, 2011  at 6:30 AM  

I came across the following Martha Steward blog article that provides detailed instructions on how to make a roller blind for you kitchen or bathroom. The following link contains easy to follow instructions as well as images with how to proceed: www.alternative-windows.com

The main consideration when making a shade or blind is its purpose. Do you want it to block out the sun completely or do you just want to use it as a decor item in your house. This will influence the type of material required for the construction.

Custom Kitchen Shade 

Days to go to new Lovilee

Kitchen love: Veggie omelette

Posted by  | Thursday, February 24, 2011  at 6:30 AM  


This recipe is ideal for breakfast, lunch or supper. An omelette is a great, easy and delicious dish to prepare. It can have almost any filling imaginable, herewith our vegan omelette.


Makes 1, 10 minutes


Omelette
  • 3 eggs, beaten
  • 5ml maizena
  • 50ml milk


Filling
  • 125ml sliced button mushrooms
  • 1 small onion, chopped
  • 125ml mozarella cheese, grated
  • 2 sliced sundries tomatoes
  • salt & pepper to taste
  • a dash of dried basil
  • rosa tomatoes, sliced in half to garnish
  • Italian parsley, to garnish (this is a favorite of mine!)


Preparation
  1. Spray "Spray-n-Cook" on the surface of a medium pan.
  2. Warm a plate to medium heat.
  3. Beat the ingredients for the omelette until foamy and pour it into the pan.
  4. Spread over the base of the pan and cover with a lid.
  5. Cook for about 3 minutes until firm - checking often.
  6. Sprinkle the filling ingredients on one half of the egg mixture and fold over.
  7. Bake for another minute in order to melt cheese.
  8. Slide onto plate and serve with homemade buttered toast.


More ideas for fillings:
  • tuna mayo, finely chopped gherkins and parsley
  • cooked mince, tomato paste and sliced red pepper
  • cooked chicken pieces, sweet and sour sauce, pineapple and sliced peppadews
  • salami, sweet corn, onion and mozarella
  • asparagus, cheese sauce and spring onions

Online: Sleepy King on Etsy

Posted by  | Wednesday, February 23, 2011  at 6:30 AM  

In my never ending search on Etsy for new ideas and creative designers I came across a shop called Sleepy King. The recent rand depreciation against the US dollar has curbed my online spending habits somewhat, but it is still nice to browse...

Shop owner Savannah Carol purchased her sewing machine at the start of 2009, after the birth of her son. She wanted to make toys for him in her spare time, and got so obsessed with making the toys that she started Sleepy King in April 2009. She has been a full time sewer since then.

Here with some of my favourites:


Days to new Lovilee

Chooseday: Five elements of design

Posted by  | Tuesday, February 22, 2011  at 6:30 AM  


The best way to start a design project is to familiarise yourself with the five elements of design:


Line - this directs the eye towards to focal point in a room, it can be curved, straight, horizontal or vertical. Straight lines tend to feel strong and masculine, whereas curvy lines reminds more of the softer and feminine side. All of a room's elements may contain line, the architecture: doors, windows, arches and floors, as well as the decor: fabrics, wallpaper, accessories and furniture.


Color - creates a mood and always exerts an emotional response, this tends to be the most important of the design principles. Studies conducted have shown that certain colors like the colour red invites our appetite (great for a kitchen) whereas the colour blue depresses appetite.


Texture - strong or rough textures like iron, hammered steel and denim fabrics exempt a masculine feel, whereas soft, shiny and sleek items provides for a softer, feminine feel.


Mass - "the amount of space or visual weight an object tends to have". A great example to demonstrate this concept is an upholstered sofa or grand piano. A glass dining room table with the same physical dimensions, places in the same space does just not carry as much visual weight. This element of design creates balance in a room.


Form - Form refers to the actual shape of an element or item in the room. If the walls are tall and slender then the best choice for furniture will also be tall and slender. The form of the furniture should echo the form of the room’s architectural elements.


Gauteng HomeMakers Expo 2011

Posted by  | Monday, February 21, 2011  at 6:30 AM  


Dates: 24 – 27 February 2011
Venue: Coca-Cola Dome, Northgate, Gauteng
Times: Thursday & Friday: 10:00 to 19:00 | Saturday & Sunday: 09:00 to 18:00
Entrance: R60 for adults | R30 for pensioners | Children under 12 free

The Gauteng HOMEMAKERS Expo is certain to make you fall in love with your home all over again this February. Homeowners wishing to improve their living area and those searching for new ideas and latest trends are sure to find what they are looking for.

This year the Gauteng HOMEMAKERS Expo 2011 presents eleven themed areas, adding a new dimension to the HOMEMAKERS visitor’s experience.
Apart from the 620 stands showcasing the latest in home lifestyle, the expo also highlights consumer trends with some exciting new features. Landscapers put a spin on garden lustre in Courtyard Couture, demonstrating that a beautiful garden design can be achieved in a small space. At Décor on a budget six top designers show you how to achieve creative brilliance without breaking the bank. Young creative artists will illustrate their latest work in the ever popular Future of Design and HOMEMAKERS will be doing their part for charity by fully supporting the Joburg Child Welfare 100 doors project. This initiative sees artists and celebrities creatively jazzing up over 100 doors, many of which will be displayed and auctioned at the expo.
Be sure not to miss the dedicated Kids Area at the HOMEMAKERS Expo. Situated on the mezzanine level this feature will tantalise all parent and kids alike with the array of children’s furniture, toys, clothing and accessories.
Craft is back, and is taking not only the continent, but the world by storm, and that is why we are showcasing the best in crafting ideas at this year’s expo. Li Edelkoord, top international trend forecaster, predicted that 2011 will be marked by a rise in creative spirit, a desire for fantasy and the expression of our subconscious. Be sure not to miss the Creative Craft area situated on the mezzanine level, its sure to make those creative fingers itch!
Now in its 18th year, the Gauteng HOMEMAKERS Expo is the country’s largest, multi-award winning home interest show.
Contact: For more information phone 0861 11 HOME/4663 or jhb@homemakers-sa.co.za

Days to go to Lovilee relaunch

Countdown to the new Lovilee

Posted by  | Sunday, February 20, 2011  at 7:44 AM  

The countdown to the launch of the new Lovilee site has begun, only 10 days to go! It is all so exciting and we cannot wait for feedback on what you are going to see!

So for all the brides-to-be, aspiring home decorators, mommies and mommies-to-be, we have lots for you in store coming 1 March 2011!

DIY: Toolbox essentials

Posted by  | Friday, February 18, 2011  at 6:30 AM  

Before we continue with our DIY tips, there are a few basic tools that are must-haves in your in-home-toolbox to make prettification and simple home repairs more convenient. The following was taken from an article on About.com and I have added some of my essentials to the list as well:

Source: Sears.com
Tape measure
A 3m tape measure should suffice. Measure twice, cut once!

Screwdrivers
Make sure that you have at least two of these, one star and one flat screwdriver. It is better to have one small and one large of each and they generally come in sets that work out cheaper than buying separately.


Pliers
I prefer sharp nosed pliers, they are ideal for the odd jewellery repair as well as getting small objects through holes.


Spirit level
Sometimes gauging with the eye still produces a skew artwork, it just pays off having one of these, no matter what size.


Claw hammer
I know, we as girls think the smaller the better, but rather buy the standard size hammer, as it is really more functional. The Claw hammer is also great for removing nails.

Assortment of nails, screws and picture hooks
I personally prefer a Hilti tool, as this prevents you from frequently hammering your fingers and assists in hitting nails in straight. They are also easy to remove with pliers and leave little to no holes afterwards.


Wire cutters
Well, what can I say, they are just needed!


Pencils
These are better than pens in marking the walls for hanging pictures etc as it can always be rubbed of with an eraser when done and almost draws on any surface.


Masking tape
How many times has having a roll of masking tape saved me from having to clean up ceilings / windows from being painted? I cannot even count, this must be one of my favourite inventions ever, really easy to use and it pulls of very easily afterwards! (Tip: When painting, always peel the tape off when the paint is still wet after the last layer to avoid pulling paint off as well.)


Stanley knife
I cannot even begin to tell you how many times I have had to use mine. There is always some fine cutting or trimming that needs to be done, where scissors will not suffice.


No more nails
This new glue on the market literally sticks everything from mirrors to tiles. It is a great no mess no fuss adhesive.


TIP: When buying tools, do not opt for the cheapest sets, rather buy a decent set that will last a lifetime.

Kitchen love: Best Chocolate Chip biscuits

Posted by  | Thursday, February 17, 2011  at 6:30 AM  

Okay, what is the difference between a cookie and a biscuit you might ask? A cookie is crispy on the outside with a soft center whereas a biscuit is crispy right through. There you have it! This recipe can be used for both a cookie or biscuit. I personally prefer the biscuit, it is delish!


Makes 12 (or less if you want really big ones), 30 minutes
  • 300g bourneville or dark chocolate
  • 100g milk or white chocolate
  • 80g brown sugar
  • 85g butter, at room temperature
  • 100g crunchy peanut butter
  • 1 large egg
  • 5ml vanilla extract
  • 100g self raising flour
  • 100g salted peanuts - large ones are best
  1. Preheat oven to 180 degrees.
  2. Chop 200g of the dark chocolate into chunks. Chop the white chocolate as well, but do not mix the two.
  3. Melt the remaining 100g dark chocolate over simmering water. (Do not let the container touch the water)
  4. Stir in the sugar, butter, peanut butter, vanilla extract and egg.
  5. Stir in the flour, peanuts, white chocolate and 3/4 of the dark chocolate chunks. The mixture should be soft.
  6. Drop the mixture onto a baking sheet leaving enough room in between to spread.
  7. Divide the rest of the dark chocolate chunks between the cookies and press into lightly into each cookie.
  8. Bake for 12-15 minutes. 
  9. Remove from the oven and leave for a few minutes to firm up before placing on a cooling rack.
  10. This will yield a crispy cookie when cool with a soft center. Should you prefer a biscuit instead of cookie, bake for longer, but be careful not to burn your precious creations!


PS: These treats are very soft due to the high chocolate content and should be stored in an airtight container in a cool place. This only applies if you have any left after 15 minutes from baking.

Online: Garden Bleu

Posted by  | Wednesday, February 16, 2011  at 6:30 AM  


I recently acquired a garden arch and I am still in the market for a garden bench, but found it really hard to find a supplier in Johannesburg. Most of my friends know that I am a total online-shopaholic! And Google, being my starting point, introduced me to a gem in Greenside, with another two stores, one in Riebeek Kasteel and another in Pretoria.

The shop is called Garden Bleu, (I had to smile when I saw their creative name) they sell everything for a garden from garden art to unique metal accessories. They stock French, Victorian, Provencial, Tuscan and European influenced products. Here with some of the unique feature items:


Visit them on their newly designed website: www.gardenbleu.co.za for more information on their stores, services and products offered.

Chooseday: The smart choice for your wedding

Posted by  | Tuesday, February 15, 2011  at 6:30 AM  

If you are getting married soon, or know someone that is on the verge of taking the big leap, we have a great one-stop online resource to assist through this chaotic time. Matha Stewart Weddings is a website that provides you with the most amazing planning checklist  tool, as well as budget manager to help make a success of your special day.

It keeps track of all your invitations sent, replies received, sends you reminders when what vendor needs to be paid and when to contact whom. It also provides an interactive table outlay page where you set up the venue size and floor plan. You are then able to seat families together with a click of a mouse and move people around, without forgetting to move their spouses.

The site also provides great real-wedding examples, provides templates and other DIY wedding ideas and is just in general your one stop wedding resource.


Happy Valentines!

Posted by  | Monday, February 14, 2011  at 7:37 AM  

I thought I would shed some light on how Valentine's day or rather St. Valentine's day originated. The day is an annual commemoration, held on 14 February, celebrating love and affection.

The day was established by Pope Gelasius I in 496 AD and was named after an early Christian martyr, Saint Valentine. According to legend, Saint Valentine was a priest, persecuted in the Roman Empire. The ruling emperor tried to convert Valentine to Roman paganism, but instead Valentine tried to convert the emperor to Christianity instead. For this, Valentine was executed on February 14.

The day first became associated with romantic love in the middle ages, when a romantic aspect was added to the story. It mentioned that Valentine had written a letter to the jailers daughter whom he had befriended and that he had signed it: "From my Valentine". In 1969 this day was deleted from the Roman calendar of saints by Pope Paul VI, but its religious observance still permitted.

In recent days we celebrate the day by the purchase of gifts, cards and flowers to the special person in your life. Males view this day as a waste of money and well conserved energy, whereas we females in turn view this day as sacred. A day where we can feel appreciated and loved.

So guys, here is a nifty last minute idea from Woolworths, that will not only make he feel appreciated, but will also allow you to spend some fun and quality time together. It is a tin with a spinning mechanism, that is full of wonderful treats. (PS: Remember the cream or massage oil for the foot rub and the back massage options!)


May you have a lovilee day!

DIY: Taste the love, valentines tea

Posted by  | Friday, February 11, 2011  at 6:30 AM  

I found the following post on Design*Sponge and just had to share it with all you creatives out there. One of their readers sent in the post on how to make your own lovilee valentines tea bags in three different ways. Not only is it nice to look at, but will certainly make the person drinking the tea feel special and loved.


Click through on the following link for step-by-step instructions on how to create the tea bags below.


Kitchen love: Sweet & Sour saucy chicken pizza

Posted by  | Thursday, February 10, 2011  at 6:30 AM  


Sweet and sour sauce

This sauce can be used as a dip for spring rolls, for stir-fries, Oriental dishes and now also pizza! It freezes really well and I always make sure I have at least one container in the freezer to use whenever.

120 ml white wine vinegar
120 ml sugar
200 ml water
10 ml oil
5 ml dried ginger
20 ml soya sauce
20 ml tomato sauce (All gold!)
30 ml corn flour

1. Heat all the ingredients except the corn flour in a saucepan.
2. Mix the corn flour with a little water and stir into the sauce.
3. Stir over medium heat until thickened and voila!


Now for the pizza

2x ready-made pizza bases (I prefer the thin ones from Woolworths)
Half the amount of sweet and sour sauce from the above recipe (1/4 per base)
250 ml chicken pieces, browned (more or less a standard chicken breast)
12 sundried tomatoes (Woolworths have lovely ones in an oil preserve)
125 ml pineapple pieces
500 ml mozzarella cheese, grated
5 ml dried basil
5 ml dried oreganum

1. Preheat the oven to 200 degrees Celcius.
2. Spread the sweet and sour sauce onto each pizza base.
3. Cut the sundried tomatoes into smaller pieces and arrange onto each base.
4. Next, arrange the chicken pieces and pineapple.
5. Top with grated cheese - add more if you prefer a really cheesy pizza.
6. To finish it off, sprinkle basil and oreganum over the cheese.
7. Bake for 8 minutes.
8. Repeat recipe.....and let me know what you think or taste for that matter!

Online: Valentines inspiration

Posted by  | Wednesday, February 9, 2011  at 6:30 AM  

I found Skippy Designs on Etsy, and it made me feel warm and fuzzy inside looking at the phodies on sale. Shopowner Mandy Lynne, a photographer in Springfield, USA's portfolio is truly inspiring with the tranquil and peaceful feel that she creates.

Love is often portrayed in reds and whites, but I think it should rather be in pastels, marshmallows and turkish delights. Visit the shop on Etsy for more photographs and be inspired!

kiss me lovely afternoon love is a game love letters   8x8 pink typewriter xo

Chooseday: Have you ever...

Posted by  | Tuesday, February 8, 2011  at 6:30 AM  

...seen such delightful biscuits in your whole life? These are so pretty that you dare note eat them! The cookies were first created for a Church bazaar in Botrivier (have no idea where this is) and were so popular that they are now sold and couriered all over South Africa.


These are excellent for weddings, tea parties or even just to have in your home for the odd occasion!


lizelle-lotter-photography
Source: The Pretty Blog

To order contact:
Charlotte +27 (0) 82 494 5236 or Robyn , alternatively you can email them for more information. 

Decor Profile: The Fabric House

Posted by  | Monday, February 7, 2011  at 7:05 AM  

Banking on Fabric

The JOZI Fabric House in Kramerville, Sandton opened it doors in September 2009 and is a one stop shop for all decor material, exclusive bedding and table decor. This concept store is the brain-child of Heather Lund, previously private banker at Nedbank. What sets this shop apart from most material shops that I have visited is that it sells short ends and remnants of the latest soft furnishing fabrics direct to the public. The off cuts are sold by weight, where-as the other full rolls are sold per meter.

The shop also stocks g-mo Footwear, a Cape Town designer shoe brand, manufactured with recycled fabrics.

Launch invite-2

DIY: The Art of hanging Art

Posted by  | Friday, February 4, 2011  at 6:30 AM  

Hanging pictures or art to look great is in some cases easier said than done. Here are a few tips and different ways to hang art in a room:

  • Choose the art - Art can range from old postcards, calendar pictures, photos, original or replica paintings etc.
  • Surround your art or pictures - add a nice frame or mat to the picture. Contrasting mats to the wall have a greater impact.
  • Find the center of the wall - the center of your first picture should be eye level or slightly above (approximately 150mm from the floor).
  • Choose the layout - this only applies if you have more than one piece you would like to hang. Trace the sizes and shapes of the frames on brown paper or newspaper, now stick them to the wall as you would like them to hang with some masking tape. It is advisable to leave these on the wall for a day or two before you hand the actual art.
  • Bigger is often better, one nicely sized piece of art can sometimes have a bigger impact than lots of art groupings together.
  • Once you are sure that you have the right layout, start hammering!
  • Remember: The smaller the nails you use, the easier to remove them and fill up the holes at a later stage.


Styles:
  • Vertical - For small walls or in vertical lines on a bigger wall.
Source: Xc3.xanga.com
  • Horisontal - Works great on long walls, I found the following horisontal alternative:
Source: TheCreativeMama
  • Symmetry - gives a formal feel to any room
  • Source: Home-Dzine
  • Clustered - I just love this, all is square and gives a great formal art display.
Source: 4.bp
  • Art shelves - a new and modern way to display art
Source: Alldrin Photography
  • Staircases - this works better in a "stepped up" format.
  • Source: AFP interiors

Kitchen love: Valentines Oozy center chocolate pudding

Posted by  | Thursday, February 3, 2011  at 6:30 AM  

Before I share this absolutely delish pudding, I want to mention that it is worth investing in a good quality kitchen scale. Sometimes weight works much easier to get your recipe going than having to measure 48,5ml or whatever odd amount of ingredient!


Makes 4 (1 for your loved one, 1 for you and another 2 for you!), 35 minutes


Filling:
·      70g dark chocolate (I use 80%)
·      50ml cream

Pudding:
·      40g brown sugar
·      50g butter
·      1 egg, beaten
·      25g flour (I know - almost nothing)
·      20g cocoa powder (NoMU is the best!)
·      20g ground almonds  (can be substituted with more flour)

1.     Preheat oven to 200 degrees.
2.     Melt the chocolate over simmering water and stir in the cream. Leave to chill for about 10 minutes.
3.     Grease 4 pudding moulds (not too big) - or 4 muffin indents of a muffin pan, which I always do. 
4.     Beat together the sugar and butter then add the egg.
5.     Fold in the flour and cocoa powder.
6.     Use enough batter to fill the moulds/"indents" to a third.
7.     Spoon the chilled chocolate mixture on top of the batter.
8.     Fill each one with the remainder of the batter.
9.     Bake for 10 minutes until set.


Prepare the plates:

Cut a heart shape out of a piece if paper. Use a small amount of cocoa and sift it through a sieve over the heart. Move the heart cut out and repeat. 

Leave the pudding to cool down slightly before using the paper with the heart cut-out and icing sugar sifted through a sieve to decorate the top of the njammy pudding.

Related Posts Plugin for WordPress, Blogger...